Getting Started
This Getting Started Guide will walk you through the core features of the Course Terrain Tool (CTT), so you can quickly get up and running.
Start by downloading the latest version from our releases page.
Mac Installation
- Download the
.dmgfile (Course-Terrain-Tool-x.x.x-universal.dmg) for the latest release - Open the
.dmgfile - Drag the icon to the Applications folder
- Open
Course Terrain Toolfrom yourApplicationsfolder
Windows Installation
- Download the
.exe(Course-Terrain-Tool-Setup-x.x.x.exe) file for the latest release - Double-click the
.exefile - Follow the on screen instructions to install
Course Terrain Tool
Install Required Tools

The first time you launch CTT, you’ll likely be presented with a prompt to install some required tools. We recommend clicking the Install Required Tools button and letting our built-in installer run (be patient, this process can take a little while). But if you have trouble, or prefer to do things manually, you can opt to manually install the required libraries yourself. Then simply relaunch CTT and we should detect the tools on your system.
Setting The Center Point
There’s two ways to set the center point on the map.
- Shift-Click: Set the center point by holding shift while left-clicking on the map.
-
Search Box: Or you can enter a latitude / longitude in the search box and select the
Set Center Asoption.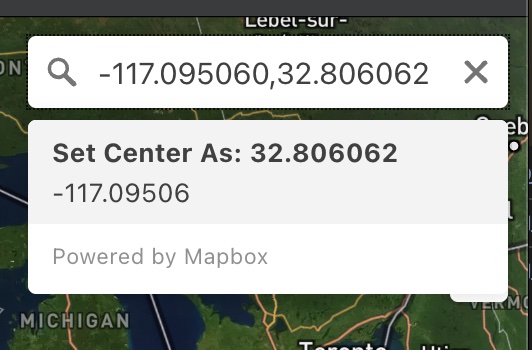
Setting inner/outer
Set your Inner Area, and optional Outer Area size (in kilometers). Make sure your course fits within the inner box with some extra padding. The square you see on the map is mostly just a guide and we’ll do some recalculations of this box later on using the data’s native CRS units and it could vary by a few meters.
Search for Data
Click the Search Data button to search our current lidar data sources for data that falls within the bounds of your defined area. This search process isn’t perfect and you’ll still need to ensure that you have data covering the entire area you want to capture. Overlaps are ok, as we’ll be merging the laz data together in a later step, but it’s important to make sure you have data covering at least 90% of your inner and outer area.
Import Data
If data isn’t available for your course via search, you can import LAS or LAZ files directly.
Setting CRS
The CRS (Coordinate Reference System) of each LAS file is required to be able to process the lidar data.
Manually Setting CRS
We do our best to automatically detect the CRS of the data when you search or import data, but we can’t always determine the CRS automatically. In these cases, you’ll need to try and track down and set the CRS manually. Try googling the project name of the lidar set and looking for links to information for the metadata of that data set. If you have trouble, ask in the Discord channel.
Exporting
Once you have data tiles covering your inner/outer areas, you’re ready to export your terrain data. The default settings should work in most cases, but you can experiment and customize with each course.
Notes
To convert a grayscale PNG/image to raw heightmap:
magick shaded.png -depth 16 gray:output.raw